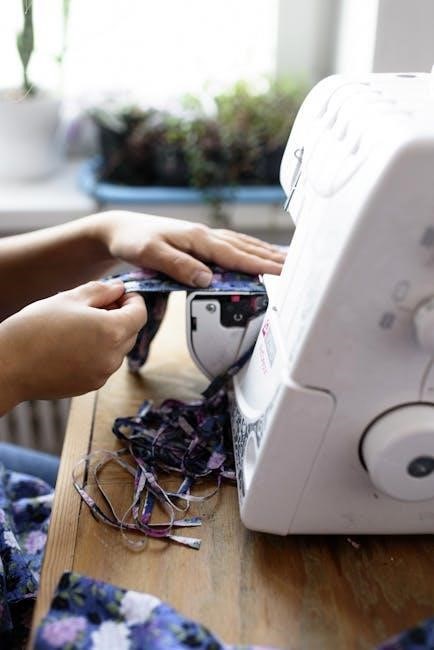
The Singer Simple sewing machine is a user-friendly, automatic device designed for basic sewing tasks․ It features a one-step buttonhole and free arm for easy operation․ Ideal for beginners and hobbyists, it comes with a comprehensive instruction manual to guide users through its features and maintenance․
1․1 Overview of the Singer Simple Sewing Machine
The Singer Simple sewing machine is a versatile and user-friendly automatic sewing machine designed for basic sewing tasks․ It features a one-step buttonhole, a free arm for circular sewing, and adjustable stitch settings․ This machine is ideal for beginners and hobbyists, offering a straightforward approach to sewing various fabric types․ With its compact design and essential functions, the Singer Simple is perfect for crafting, repairing, and creating a wide range of sewing projects․ The included instruction manual provides clear guidance on operation, maintenance, and troubleshooting․
1․2 Importance of Reading the Instruction Manual
Reading the instruction manual for the Singer Simple sewing machine is essential for safe and effective operation․ It provides detailed safety guidelines, such as proper electrical usage and maintenance tips, to ensure longevity․ The manual explains how to identify and use machine parts, thread the device, and perform basic functions․ It also offers troubleshooting solutions and warranty information․ By following the manual, users can maximize functionality, avoid potential hazards, and make the most of their sewing experience․ It serves as a comprehensive guide for both beginners and experienced users․
Safety Precautions
Always unplug the machine after use to avoid accidents․ Never leave it unattended or let children operate it unsupervised․ Wear safety glasses and keep loose clothing tied back while sewing․
2․1 General Safety Guidelines
To ensure safe operation, always unplug the Singer Simple sewing machine after use and never leave it unattended․ Keep children away from the machine while it is in operation․ Avoid wearing loose clothing or jewelry that could get caught in moving parts․ Use the machine on a stable, flat surface to prevent accidents․ Always follow the instructions provided in the manual and take regular breaks to avoid fatigue․ Never touch electrical components with wet hands, and keep the area around the machine clean and clear of flammable materials․ Adhere to these guidelines for safe and enjoyable sewing experiences․
2․2 Electrical Safety Instructions
Always unplug the Singer Simple sewing machine when not in use to prevent accidents․ Ensure the machine is placed on a dry, stable surface away from water or moisture․ Never touch electrical components with wet hands or while standing on damp surfaces․ Use the machine with the correct voltage and avoid using adapters or voltage converters․ Keep the power cord away from hot surfaces or sharp objects to prevent damage․ If any electrical issue arises, contact an authorized service center for repairs․ Follow these guidelines to ensure safe operation and avoid electrical hazards․
2․3 Usage Safety Tips
Always follow safety guidelines while using the Singer Simple sewing machine․ Avoid pulling or pushing fabric forcefully, as this may cause the needle to break․ Keep loose clothing or long hair tied back to avoid entanglement with moving parts․ Wear safety glasses to protect your eyes from debris․ Ensure children are supervised when near the machine․ Never sew over pins, and always use the correct presser foot for the fabric type․ Keep the work area well-lit and clear of clutter․ Proper usage ensures a safe and efficient sewing experience․
Parts and Accessories
The Singer Simple sewing machine includes essential parts like the one-step buttonhole, free arm, and extension table․ Accessories such as hoops and additional presser feet enhance functionality․
3․1 Identifying the Machine Parts
The Singer Simple sewing machine features a range of essential components designed for ease of use․ The free arm allows for circular sewing, while the one-step buttonhole simplifies creating buttonholes․ Other key parts include the spool pins, presser foot, stitch selector, and power switch․ Understanding each part ensures proper operation and maintenance․ Familiarize yourself with these components to maximize functionality and troubleshoot common issues effectively․
3․2 Understanding the Accessories Included
The Singer Simple sewing machine comes with a variety of accessories to enhance your sewing experience․ These include extension tables, hoops, frames, sewing notions, spool pins, caps, stands, scissors, and embroidery supplies․ Each accessory serves a specific purpose, such as stabilizing fabric, managing threads, or facilitating intricate designs․ Familiarizing yourself with these items ensures you can utilize the machine’s full potential, making sewing tasks easier and more efficient․ Proper use of these accessories also extends the machine’s functionality, allowing you to tackle a wide range of projects with precision and confidence․
3․3 Optional Accessories for Enhanced Functionality
Optional accessories can enhance the functionality of your Singer Simple sewing machine, allowing for greater versatility in your projects․ These include additional presser feet for specialized stitches, embroidery hoops for decorative sewing, and extension tables for managing larger fabrics․ Other optional items like quilting guides and threading aids can streamline your workflow․ These accessories are available for purchase separately and can be found on Singer’s official website or through authorized retailers․ They are designed to expand the machine’s capabilities, catering to more complex or creative sewing needs․
Setting Up the Machine
Setting up the Singer Simple sewing machine involves unpacking, inspecting, and placing it on a stable surface․ Proper threading and bobbin insertion are essential for smooth operation․ Always follow the manual’s guidance for correct setup to ensure optimal performance and safety․
4․1 Unpacking and Initial Inspection
Begin by carefully unpacking the Singer Simple sewing machine from its box․ Inspect the machine for any visible damage or defects․ Ensure all accessories, such as the power cord, needles, and bobbins, are included․ Check the instruction manual for a list of provided items․ Before use, verify that all parts are intact and properly attached․ If any damage or missing components are found, contact Singer customer support immediately․ This step ensures safety and optimal performance for your sewing experience․
4․2 Placing the Machine on a Stable Surface
Place the Singer Simple sewing machine on a flat, stable surface, such as a sturdy table or countertop․ Ensure the area is clear of clutter and away from water sources or direct sunlight․ Avoid placing the machine on unstable or uneven surfaces, as this may cause vibrations or imbalance during operation․ Position the machine in a well-ventilated area to prevent overheating․ Always unplug the machine when not in use to ensure safety․ A stable setup guarantees smooth operation and extends the machine’s lifespan․
4․3 Threading the Machine
To thread the Singer Simple sewing machine, start by raising the take-up lever to its highest position․ Insert the thread through the spool pin and guide it through the machine’s tension discs․ Then, pass the thread through the take-up lever and the needle bar guide․ Finally, thread the needle from front to back․ Gently pull the thread to ensure it is seated properly in the tension discs․ Leave a small amount of thread hanging below the needle for sewing․ Always refer to the manual for visual guidance to ensure correct threading․
4․4 Winding and Inserting the Bobbin
To wind the bobbin, place it on the winder and pull the thread end through the bobbin’s hole․ Hold the thread tail and press the foot pedal to wind evenly․ Once full, cut the thread and remove the bobbin․ Insert the bobbin into the bobbin case, ensuring it fits snugly․ Pull the thread gently to seat the bobbin properly․ Make sure the thread is not tangled and lies flat in the case․ Refer to the manual for visual guidance to ensure correct placement and tension for smooth stitching․
Basic Sewing Operations
The Singer Simple sewing machine allows for straightforward sewing operations, including starting projects, sewing straight lines, and backstitching for secure seams․ It guides fabric smoothly for even stitching and offers easy operation for beginners, ensuring precise results for various sewing tasks․ The machine’s simple controls make it easy to manage fabric and complete projects efficiently, providing a reliable experience for home sewing needs․ Always refer to the manual for step-by-step guidance on basic operations to achieve professional-quality results․ Ensure the machine is set to the correct settings before starting any project․
5․1 Starting a New Sewing Project
Starting a new sewing project with the Singer Simple sewing machine begins with preparing the machine and fabric․ Ensure the machine is placed on a stable surface and unplugged when not in use․ Select your fabric and pre-wash it if necessary to prevent shrinkage․ Iron the fabric to remove wrinkles for accurate measurements․ Thread the machine according to the manual, choosing the appropriate needle and thread type for your fabric․ Once ready, place the fabric under the needle and begin with a straight stitch to secure the starting point․ This ensures a smooth and professional finish for your project․
5․2 Sewing Straight Stitches
Sewing straight stitches on the Singer Simple machine is straightforward․ Set the stitch selector to the straight stitch option, typically the default setting․ Place the fabric under the needle, ensuring it lies flat․ Lower the presser foot gently to secure the fabric․ Start sewing at a slow, steady pace, guiding the fabric smoothly․ Maintain even tension on the fabric as it moves under the needle․ Use the edge guide for consistent alignment․ Avoid pulling or pushing the fabric excessively, as this can cause uneven stitching or needle breakage․ This stitch is ideal for general sewing and repairing seams․
5․3 Backstitching for Secure Seams
Backstitching is essential for securing seams on the Singer Simple sewing machine․ Begin by sewing forward a few stitches, then press the reverse button to stitch back over them․ This reinforces the seam’s start and end, preventing fraying․ Ensure the machine is set to the straight stitch or a dedicated backstitch setting․ Use a matching thread color for a seamless look․ Avoid pulling the fabric to maintain even stitches․ For added security, consider shortening the stitch length before backstitching․ This technique ensures durable and professional-looking seams․
5․4 Turning the Fabric While Sewing
Turning the fabric while sewing allows for smooth transitions and precise stitching; Use the free arm to maneuver fabric easily, especially for circular or curved seams․ Avoid pulling the fabric, as this can cause distortion or uneven stitches․ Instead, guide the fabric gently, maintaining a steady pace․ For sharp turns, reduce the stitch length and sew slowly․ This ensures accurate control and professional-looking results․ Proper fabric handling enhances the overall quality of your sewing projects on the Singer Simple machine․
5․5 Setting the Machine to Off
To properly set the Singer Simple sewing machine to off, ensure all stitching is complete and the needle is in its highest position․ Turn the power switch to the “off” position and unplug the machine from the electrical outlet․ This prevents accidental start-ups and reduces energy consumption․ Always unplug the machine after use to maintain safety and prolong its operational life․ Proper shutdown ensures the machine remains in good working condition for future projects․

Advanced Features and Techniques
The Singer Simple sewing machine offers advanced features like one-step buttonholes, adjustable stitch length, and width customization․ These options enhance sewing efficiency and creativity for various projects․
6․1 Using the One-Step Buttonhole Feature
The Singer Simple sewing machine’s one-step buttonhole feature allows for quick and precise buttonhole creation․ Position the fabric, select the buttonhole stitch, and let the machine automatically sew a perfectly sized hole․ This feature is ideal for dresses, shirts, and other garments requiring professional-looking buttonholes․ Simply place the buttonhole foot, align the fabric, and start sewing․ The machine handles the rest, ensuring consistent results every time․ This feature simplifies a once-complicated task, making it accessible for sewers of all skill levels to achieve professional-quality finishes effortlessly․
6․2 Sewing Different Fabric Types
The Singer Simple sewing machine accommodates various fabric types, ensuring versatility for diverse projects․ For lightweight fabrics like cotton or silk, use a sharp needle and adjust stitch length for smooth results․ Heavier fabrics such as denim require a heavy-duty needle and increased tension․ Stretch fabrics, like knits, benefit from a stretch stitch or zigzag setting․ Always test stitches on scrap fabric to ensure compatibility and prevent damage․ This adaptability makes the Singer Simple ideal for sewing a wide range of materials, from delicate to sturdy fabrics, ensuring professional-quality outcomes for every project․
6․3 Adjusting Stitch Length and Width
The Singer Simple sewing machine allows easy adjustment of stitch length and width to suit your sewing needs․ Use the stitch length dial to set the distance between stitches, ideal for delicate fabrics or heavy-duty sewing․ The stitch width dial adjusts the stitch’s side-to-side measurement, perfect for reinforcing seams or decorative stitching․ Always test adjustments on scrap fabric before sewing your final project to ensure desired results․ Refer to the manual for specific settings tailored to different fabric types and stitching requirements, ensuring optimal performance and professional-quality seams․
6․4 Using the Free Arm for Circular Sewing
The Singer Simple sewing machine features a free arm, ideal for sewing circular or curved areas like sleeves, hemming pants, or sewing cuffs․ To access the free arm, remove the flatbed attachment, exposing the curved area beneath․ This allows easy maneuvering of fabric for precise stitching․ Use the free arm for hard-to-reach sewing tasks, ensuring smooth, even results․ For added stability, consider using the optional extension table․ Always guide the fabric gently and maintain consistent tension to achieve professional-looking circular seams․ This feature enhances versatility for various sewing projects․
Maintenance and Care
Regular maintenance ensures optimal performance․ Clean lint from the machine, oil moving parts, and check the needle․ Follow the manual for proper care and longevity․
7․1 Cleaning the Machine
Cleaning the Singer Simple sewing machine is essential for maintaining its performance․ Use a soft, dry cloth to wipe down the exterior and remove lint․ A small, dry brush is provided to clean between the machine’s parts, such as the bobbin area and feed dogs․ Regularly inspect and clean the stitch plate and tension discs to ensure smooth operation․ Avoid using harsh chemicals or liquids, as they may damage the machine․ For stubborn stains, a slightly damp cloth can be used, but ensure no moisture enters the internal components․ Regular cleaning prevents dust buildup and extends the machine’s lifespan․
7․2 Oiling the Machine
Oiling the Singer Simple sewing machine is crucial for smooth operation and longevity․ Use only high-quality sewing machine oil, applied sparingly to metal parts as indicated in the manual․ Avoid using household oils, as they can damage components․ Oil the hook race, bobbin area, and any moving metal parts․ Turn the handwheel gently to distribute the oil evenly․ Over-oiling can attract lint, so wipe excess with a clean cloth․ Regular oiling prevents friction and ensures consistent stitch quality․ Always refer to the manual for specific oiling points and frequency recommendations․
7․3 Replacing the Needle
To replace the needle on your Singer Simple sewing machine, first ensure the machine is turned off and unplugged․ Raise the needle to its highest position by turning the handwheel․ Press the needle release lever located near the needle bar to remove the old needle․ Insert the new needle, ensuring it aligns with the needle bar and is securely fastened․ Always use Singer-recommended needles for compatibility․ After replacing, test the machine by sewing on scrap fabric to ensure proper function․ This maintenance ensures consistent stitching and prevents damage to the machine․
7․4 Checking and Replacing the Belt
To ensure optimal performance, regularly inspect the belt for signs of wear or damage․ Turn off and unplug the machine before examination․ Locate the belt near the handwheel or motor․ If cracks, fraying, or excessive stretching are evident, replace the belt with a Singer-approved part․ Align the new belt properly and tighten it according to the manual․ Improper tension can affect stitching quality․ After replacement, test the machine at a low speed to ensure smooth operation․ Regular belt maintenance prevents unexpected breakdowns and maintains sewing accuracy․
Troubleshooting Common Issues
This section helps resolve common issues like the machine not turning on or thread breaking․ Check power sources, ensure proper threading, and refer to the manual for solutions․
8․1 The Machine Will Not Turn On
If the Singer Simple sewing machine fails to turn on, first check the power source․ Ensure the machine is properly plugged into a functioning electrical outlet․ Verify that the power cord is undamaged and securely connected to both the machine and the outlet․ If using a surge protector, check that it is working․ Some models may have a fuse in the plug or a circuit breaker that has tripped․ Consult the manual for specific guidance or contact Singer support for assistance․ Always prioritize electrical safety when troubleshooting․
8․2 The Thread is Breaking Frequently
If the thread breaks often, check the quality and type of thread used․ Ensure it is suitable for your fabric․ Verify that the machine is threaded correctly, following the manual’s guide․ Check for any tangles or knots in the thread․ Adjust the tension discs to ensure they are not too tight․ Use the appropriate needle size and type for your fabric․ Avoid pulling the fabric while sewing, as this can cause unnecessary tension on the thread․ Keep the machine clean and well-oiled to maintain smooth operation․ Consult the manual for troubleshooting steps or contact Singer support for further assistance․
8․3 The Stitch Quality is Poor
Poor stitch quality can result from incorrect thread tension, improperly inserted needles, or mismatched thread and fabric types․ Check that the bobbin is correctly seated and the thread is evenly tensioned․ Ensure the needle is compatible with your fabric and properly aligned․ Avoid using low-quality or old thread, as it may break or fray․ Keep the machine clean and oiled to ensure smooth operation․ If issues persist, refer to the manual for tension adjustment guides or consult Singer’s support for further troubleshooting assistance․ Testing on scrap fabric can help identify and resolve the issue effectively․
8․4 The Bobbin Thread is Not Picking Up
If the bobbin thread is not picking up, ensure the machine is properly threaded and the bobbin is correctly installed․ Check that the bobbin thread is coming through the tension spring and guide․ Verify that the needle is inserted correctly, with the flat side facing the correct direction․ If the issue persists, re-thread the machine, ensuring the thread path is followed accurately․ Consult the manual for proper bobbin installation and threading techniques․ If the problem continues, contact Singer support for further assistance or to schedule a service check․
Accessories and Replacement Parts
The Singer Simple sewing machine comes with essential accessories like bobbins, needles, and a dust cover․ Additional accessories, such as extension tables or specialized feet, can enhance functionality․ Replacement parts, including belts and needles, are available through Singer’s official website or authorized dealers to ensure optimal performance and longevity of the machine․
9․1 What Comes with the Machine
The Singer Simple sewing machine includes essential accessories like bobbins, needles, and a dust cover․ Additional items such as a seam ripper, screwdriver, and instruction manual are also provided․ These accessories ensure smooth operation and help users maintain the machine properly․ The comprehensive packaging allows users to start sewing immediately, covering all basic needs without requiring additional purchases upfront․ This setup is designed to enhance the sewing experience and provide convenience for both beginners and experienced sewists alike․
9․2 Recommended Additional Accessories
For enhanced functionality, consider adding accessories like extension tables, hoops, and frames․ These improve handling of large fabrics and quilting projects․ Sewing notions, spool pins, and additional bobbins are also useful․ Specialized presser feet, such as zipper or blind hem feet, expand stitching options․ Embroidery supplies and scissors can further customize your sewing experience․ These accessories support various fabric types and techniques, ensuring versatility and convenience for diverse sewing needs․ They are available separately to complement the Singer Simple sewing machine’s capabilities and enhance your creative projects․
9․3 Ordering Replacement Parts
To maintain your Singer Simple sewing machine’s performance, genuine replacement parts are essential․ Visit Singer-authorized retailers or the official Singer website to order parts․ Ensure you have the machine’s model number and specific part number for accuracy․ Check the manual or Singer’s online database for part details․ Genuine parts guarantee compatibility and preserve your machine’s warranty․ Avoid unauthorized sellers to maintain quality and functionality․ Singer offers worldwide shipping through authorized suppliers, making it convenient to obtain the necessary components for your sewing machine․ Always verify authenticity to ensure optimal performance and longevity of your Singer Simple sewing machine․
Warranty and Support
The Singer Simple sewing machine comes with a comprehensive warranty and dedicated customer support․ Singer offers resources for troubleshooting, repairs, and maintenance through authorized service centers and online assistance․
10․1 Understanding the Warranty Coverage
The Singer Simple sewing machine is backed by a comprehensive warranty program designed to protect your investment․ The warranty typically covers defects in materials and workmanship for a specified period, ensuring repairs or replacements are handled at no additional cost․ Registration may be required to activate the warranty, and coverage varies by region․ It’s important to review the terms and conditions outlined in the manual to understand what is included and any potential limitations or exclusions, such as damage caused by misuse or normal wear and tear․
10․2 Contacting Singer Customer Support
For assistance with your Singer Simple sewing machine, Singer offers multiple avenues for customer support․ You can reach their team by phone, email, or through the official Singer website․ The support team is available to address inquiries, provide troubleshooting guidance, and assist with warranty claims․ Additionally, Singer’s website features a comprehensive FAQ section and downloadable resources, ensuring you have quick access to the information you need to resolve any issues efficiently and effectively․ Timely and reliable support is a priority for Singer to enhance your sewing experience․
10․3 Finding Authorized Service Centers
To locate an authorized service center for your Singer Simple sewing machine, visit Singer’s official website․ Use the “Service Locator” tool to find certified centers near you․ These centers provide professional maintenance, repairs, and genuine parts․ For assistance, contact Singer customer support via phone or email․ They can guide you to the nearest authorized center․ Ensure to use only Singer-approved service centers to maintain your machine’s warranty and performance․ This ensures reliable and high-quality service tailored to your sewing machine’s needs․ Always verify the center’s authorization to avoid unauthorized repairs․