The Singer Simple Sewing Machine is a user-friendly‚ automatic sewing machine designed for basic sewing tasks. It features a one-step buttonhole‚ free arm‚ and multiple stitch patterns‚ making it ideal for beginners and versatile for various sewing projects.
1.1 Overview of the Singer Simple Sewing Machine
The Singer Simple Sewing Machine is a compact‚ automatic sewing machine designed for ease of use. It is ideal for beginners and experienced sewers alike‚ offering essential features for a variety of sewing tasks. With its lightweight design and user-friendly interface‚ this machine provides a smooth sewing experience. It includes multiple stitch patterns‚ a one-step buttonhole feature‚ and a free arm for sewing tubular items. The machine is perfect for household use and small projects‚ making it a versatile tool for creative sewing endeavors.
1.2 Key Features and Benefits
The Singer Simple Sewing Machine boasts a range of features that make sewing easy and efficient. It includes a one-step buttonhole for quick and precise buttonhole creation‚ a free arm for sewing tubular items like sleeves and cuffs‚ and an automatic needle threader to save time. The machine offers 23 built-in stitches‚ catering to various fabric types and sewing projects. Its lightweight design ensures portability‚ while the intuitive controls provide a seamless sewing experience. These features make it an excellent choice for both beginners and experienced sewers‚ ensuring versatility and ease of use.
Safety Precautions and Guidelines
Always read the manual before use. Keep children away‚ avoid water exposure‚ and use only recommended attachments. Ensure proper ventilation and follow electrical safety guidelines carefully.
2.1 Important Safety Instructions
Always read and understand the manual before using the Singer Simple Sewing Machine. Keep children away and do not allow the machine to be used as a toy. Ensure the machine is placed on a stable‚ flat surface and avoid exposure to water or moisture. Use only Singer-recommended attachments and follow all electrical safety guidelines. Never touch the machine with wet hands or while standing on a damp surface. Regularly inspect the power cord and plug for damage. Ensure proper ventilation and follow all safety precautions to avoid accidents.
2.2 Electrical Safety Tips
Plug the Singer Simple Sewing Machine into a grounded electrical outlet to prevent shocks. Avoid overloading circuits and keep the machine away from water. Never operate it with wet hands or in damp environments. Regularly inspect the power cord for fraying or damage. If damaged‚ replace immediately. Do not use adapters or extension cords that may compromise safety. Unplug the machine when not in use or during maintenance. Ensure compliance with electrical standards like IEC/EN 60335-2-28 and UL1594 for safe operation.
2.3 Usage Restrictions and Warnings
Use the Singer Simple Sewing Machine only as described in the manual. Keep it out of children’s reach and avoid using it near flammable materials. Do not use it as a toy or for industrial purposes. Never sew over pins or metal objects‚ as this can damage the machine. Ensure the machine is placed on a stable‚ flat surface. Follow all safety guidelines to prevent accidents and maintain optimal performance. Adhere to these restrictions to ensure safe and effective operation of the machine.

Machine Parts and Accessories
The Singer Simple Sewing Machine includes a free arm‚ various presser feet‚ and essential accessories like bobbins‚ needles‚ and a dust cover for efficient sewing operations.
3.1 External Components of the Singer Simple
- The Singer Simple features a free arm for easy sewing of tubular items like sleeves and pant legs.
- It includes various presser feet‚ such as the all-purpose foot and zipper foot‚ for different sewing tasks.
- The stitch selector allows users to choose from multiple stitch patterns for various fabrics.
- The tension dials enable adjustment of thread tightness for consistent stitching.
- The power switch and speed control provide easy operation and control over sewing speed.
- The bobbin compartment and needle plate are externally accessible for quick threading and maintenance.
These components are designed to enhance usability and versatility for a wide range of sewing projects.
3.2 Internal Components and Their Functions
- The motor powers the machine‚ enabling smooth operation and consistent stitching.
- The gear system transmits power from the motor to the needle and feed dogs.
- The feed dogs move fabric evenly under the needle for precise stitching.
- The bobbin case holds the bobbin thread‚ ensuring proper stitch formation.
- The shuttle hook loops the thread around the bobbin thread to create stitches.
- The tension discs regulate thread tightness for balanced stitching.
These internal components work together to ensure efficient and accurate sewing performance.
3.3 Included Accessories and Their Uses
- All-Purpose Foot: For general sewing and straight stitching.
- Zipper Foot: Guides fabric evenly when sewing zippers or thick materials.
- Buttonhole Foot: Designed specifically for creating precise buttonholes.
- Edge Guide: Helps maintain straight seams and consistent fabric alignment.
- Bobbin Pack: Includes extra bobbins for different thread colors or types.
- Needles: Assorted sizes for various fabric thicknesses.
- Dust Cover: Protects the machine from dust when not in use.
These accessories enhance versatility and convenience‚ enabling users to tackle a variety of sewing tasks efficiently.
Setting Up and Preparing the Machine
Setting up the Singer Simple involves unpacking‚ placing the machine on a stable surface‚ and ensuring all accessories are included. Refer to the manual for detailed preparation steps.
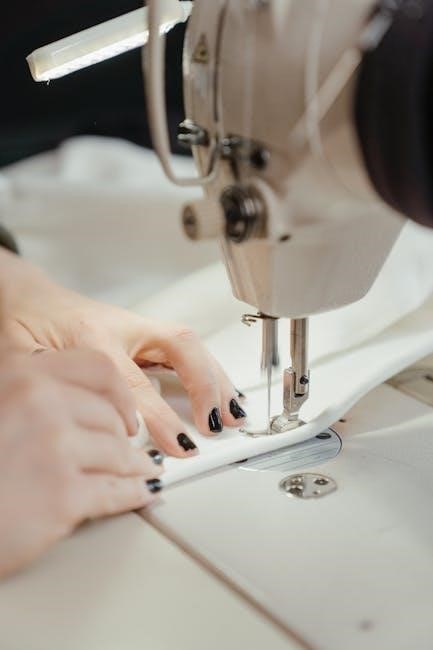
4.1 Threading the Machine
To thread the Singer Simple Sewing Machine‚ start by locating the spool pin and gently pull the thread through the machine’s tension discs. Insert the thread through the take-up lever‚ then guide it through the needle bar and finally through the needle. Leave a small loop at the end and pull gently to seat the thread properly. Ensure the thread is not twisted and flows smoothly. Refer to the manual for specific threading diagrams and steps to avoid misalignment. Proper threading ensures consistent stitch quality and prevents machine jams.
4.2 Winding and Installing the Bobbin
To wind the bobbin‚ place it on the bobbin winder and draw the thread through the guide. Hold the thread end and press the foot pedal to start winding. Stop when the bobbin is about 80% full. Trim the excess thread and remove the bobbin. To install‚ insert the bobbin into the bobbin case‚ ensuring it sits correctly. Pull the thread gently to seat it‚ then close the case. Ensure the bobbin is properly seated for smooth stitching. Follow the manual for precise alignment and tension adjustment.
4.3 Proper Needle Installation
To install the needle correctly‚ first‚ turn off the machine and unplug it for safety. Locate the needle bar and screwdriver. Remove the old needle by turning the screw counterclockwise. Insert the new needle with the flat side facing the correct direction (as indicated in the manual). Tighten the screw firmly. Ensure the needle is secure to avoid vibration or damage. Handle the needle carefully to prevent injury. Proper installation ensures smooth stitching and optimal performance. Always refer to the manual for specific alignment and tightening instructions.

Basic Sewing Operations
The Singer Simple Sewing Machine allows easy starting and stopping with a convenient control. Adjust stitch length and width for customization. Sew forward and backward effortlessly‚ and maintain proper tension for smooth stitches.
5.1 Starting and Stopping the Machine
To start the Singer Simple Sewing Machine‚ ensure it is placed on a stable‚ flat surface. Plug in the power cord and press the power switch. The machine will hum softly when turned on. To stop‚ press the power switch again and unplug the machine if not in use. Always follow safety guidelines‚ such as keeping children away and avoiding use as a toy. Proper starting and stopping maintain machine longevity and ensure safe operation.
5.2 Adjusting Stitch Length and Width
The Singer Simple Sewing Machine allows easy adjustment of stitch length and width to suit various fabrics and sewing projects. Use the stitch selection dial to choose the desired stitch pattern. Adjust the stitch length by turning the stitch length dial‚ located on the front of the machine. Similarly‚ modify the stitch width using the stitch width dial. Refer to the stitch guide on the machine or in the manual for recommended settings. Always test adjustments on scrap fabric before sewing your final project to ensure optimal results.
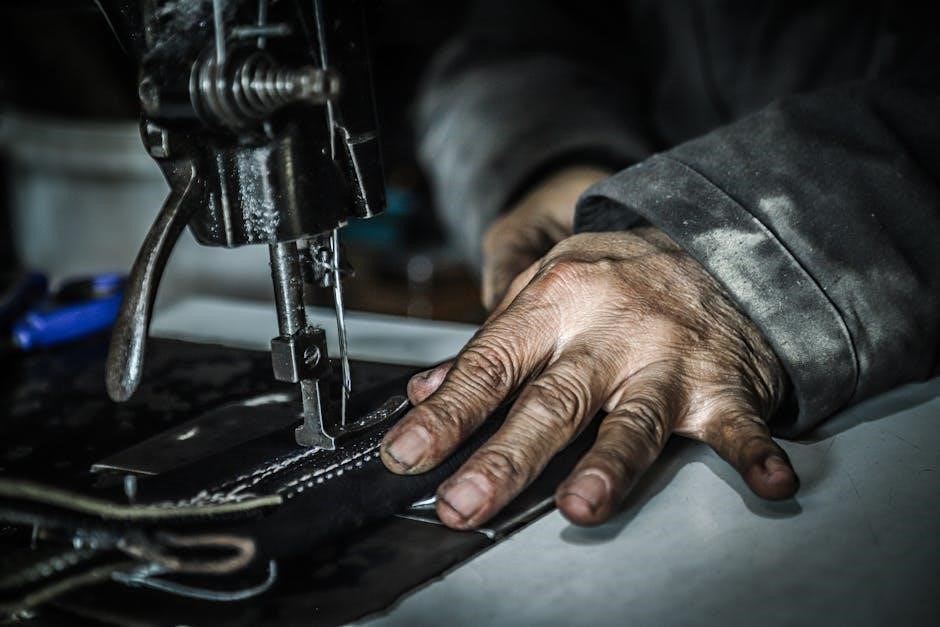
5.3 Sewing Forward and Backward
To sew forward‚ ensure the machine is set to the desired stitch pattern and begin gently guiding the fabric under the presser foot. For reverse stitching‚ engage the reverse stitch lever or button‚ typically located on the front or side of the machine. This feature is useful for securing seams at the beginning or end of a stitch line. Always maintain steady control over the fabric to ensure even stitching. Practice on scrap fabric to familiarize yourself with the machine’s forward and reverse functions.
5.4 Tension Adjustment for Optimal Stitches
Proper tension adjustment is essential for achieving consistent and professional-looking stitches. The Singer Simple Sewing Machine features adjustable tension dials for both the upper and bobbin threads. To adjust‚ start by sewing on scrap fabric to test the stitch quality. If the stitches are uneven or puckered‚ gently turn the tension dials clockwise or counterclockwise until the fabric lies flat and the stitches are balanced. Always refer to the manual for specific guidance on tension settings for different fabrics and stitch types.
Advanced Features and Techniques
The Singer Simple Sewing Machine offers advanced features like one-step buttonholes‚ adjustable stitch length‚ and 32 stitch patterns‚ enabling versatile and precise sewing for both beginners and experts.
6.1 Using the One-Step Buttonhole Feature
The Singer Simple Sewing Machine simplifies buttonhole creation with its one-step feature. Place fabric under the buttonhole foot‚ align edges‚ and press start. The machine automatically sews perfect buttonholes‚ ensuring professional results every time. This feature is ideal for garments and home decor projects‚ saving time and effort. Follow manual guidelines for optimal results and explore creative possibilities with this convenient function.
6.2 Sewing with Different Presser Feet
The Singer Simple Sewing Machine comes with various presser feet‚ each designed for specific tasks. Use the zigzag foot for general sewing‚ the blind hem foot for invisible hems‚ and the zipper foot for precise zipper installation. To change feet‚ lift the lever or press the button‚ then attach the desired foot. Always refer to the manual for specific instructions. Using the correct presser foot enhances fabric control and ensures professional-quality stitches‚ making your sewing projects easier and more efficient. Explore the included feet to expand your sewing capabilities.
6.3 Selecting the Right Stitch for the Fabric
The Singer Simple Sewing Machine offers various stitch patterns suited for different fabrics. Choose the straight stitch for lightweight materials‚ zigzag for stretchy fabrics‚ and decorative stitches for embellishments. Always select a stitch that matches your fabric type to ensure secure seams and prevent damage. Refer to the machine’s stitch guide for recommendations. Testing the stitch on scrap fabric before sewing ensures the best results. By selecting the right stitch‚ you achieve professional-quality finishes and extend the life of your sewing projects. This feature enhances versatility for both beginners and experienced sewists.

Maintenance and Care
Regularly clean the feed dog and hook area to ensure smooth operation. Lubricate the machine with Singer-recommended oil to maintain performance. Cover the machine when not in use to protect it from dust and debris‚ ensuring longevity and optimal functionality.
7.1 Cleaning the Machine
To maintain your Singer Simple Sewing Machine‚ regular cleaning is essential. Turn off and unplug the machine before cleaning. Remove the needle plate and gently brush the feed dog and hook area with a soft-bristled brush to eliminate lint and debris. Use a lint brush or a clean cloth to wipe down the exterior. Avoid using harsh chemicals or abrasive materials. For stubborn dust‚ lightly dampen a cloth with water‚ but ensure no moisture enters internal components. Allow the machine to air dry before use. Regular cleaning ensures smooth operation and extends the machine’s lifespan.
7.2 Oiling the Machine
Regular oiling is crucial for maintaining the Singer Simple Sewing Machine. Turn off and unplug the machine. Remove the needle plate to access the internal mechanisms. Apply a few drops of high-quality sewing machine oil to the hook and feed dog. Allow the machine to sit for 10-15 minutes to let the oil distribute evenly. Use a clean cloth to wipe away any excess oil. Oiling ensures smooth operation‚ prevents friction‚ and extends the machine’s lifespan; Refer to the manual for specific oiling points and frequency recommendations.
7.3 Troubleshooting Common Issues
Troubleshooting is essential for maintaining the Singer Simple Sewing Machine’s performance. Common issues include thread breaking‚ uneven stitches‚ or the machine not turning on. For thread breakage‚ check for loose tension or improper threading. Uneven stitches may result from incorrect stitch length or width settings. If the machine won’t start‚ ensure it is properly plugged in and the power switch is functioning. Refer to the manual for detailed solutions. Regular maintenance‚ such as cleaning and oiling‚ can prevent many issues. If problems persist‚ consult Singer’s customer support or authorized service centers;
Accessories and Attachments
The Singer Simple Sewing Machine comes with various accessories‚ including presser feet‚ bobbins‚ and a needle threader‚ to enhance sewing versatility and efficiency for different projects.
8.1 Types of Presser Feet and Their Uses
The Singer Simple Sewing Machine includes various presser feet to accommodate different sewing tasks. The standard presser foot is ideal for straight stitching‚ while the zipper foot is designed for sewing zippers and thick fabrics. The blind hem foot is perfect for creating invisible hems‚ and the zigzag foot allows for decorative stitching. Additional feet‚ such as the buttonhole and walking feet‚ enhance functionality for specific projects‚ ensuring versatility and precision in your sewing endeavors.
8.2 Optional Accessories for Enhanced Sewing
Optional accessories for the Singer Simple Sewing Machine can enhance your sewing experience. An extension table provides extra workspace for large projects‚ while additional presser feet‚ like the walking foot or quilting foot‚ handle specialized tasks. Extra bobbins and needles ensure you’re prepared for various fabrics. A sewing notions kit or embroidery hoop can expand your creative possibilities. These accessories are designed to complement the machine’s capabilities‚ allowing you to tackle more complex or diverse sewing projects with ease and precision.
Fabric and Thread Guidance
Selecting the right fabric and thread ensures optimal sewing results. Choose fabrics suitable for your project‚ and match thread color and type to fabric for consistency. Always use high-quality threads and appropriate needles for different materials to achieve professional-looking stitches.
9.1 Choosing the Right Fabric for Your Project
Selecting the appropriate fabric is crucial for successful sewing. Cotton‚ polyester‚ and blends are ideal for beginners‚ offering durability and ease of handling. For delicate projects‚ opt for lightweight fabrics like silk or voile‚ while heavier materials such as denim or canvas are perfect for sturdy creations. Always consider the thread count and fabric weight to ensure compatibility with your Singer Simple Sewing Machine. Proper fabric selection enhances both the quality and appearance of your sewing projects.
9.2 Selecting the Appropriate Thread Type
Selecting the right thread type is essential for optimal sewing results. For general sewing‚ 100% cotton or polyester threads are ideal due to their strength and durability. Cotton thread is best for natural fabrics like cotton and linen‚ while polyester thread works well with synthetic or blended fabrics. For delicate or stretchy fabrics‚ consider using a cotton-wrapped polyester thread for added flexibility. Always match the thread color to your fabric for a professional finish and ensure the thread is compatible with your Singer Simple Sewing Machine’s capabilities.
Stitch Selection and Customization
The Singer Simple Sewing Machine offers 32 built-in stitch patterns‚ including straight‚ zigzag‚ and decorative options. Adjust stitch length and width to customize your sewing projects efficiently.
10.1 Understanding the Stitch Patterns
The Singer Simple Sewing Machine features 32 built-in stitch patterns‚ catering to various sewing needs. These include straight stitches for basic sewing‚ zigzag stitches for stretchy fabrics‚ and decorative stitches for embellishments. Each stitch pattern serves a specific purpose‚ such as reinforcing seams or adding aesthetic details. The machine allows for easy selection of stitches via a dial or button‚ depending on the model. Refer to the manual for detailed diagrams and recommendations on stitch selection for different fabric types to achieve professional-looking results.
10.2 Adjusting Stitch Length and Width
The Singer Simple Sewing Machine allows for easy adjustment of stitch length and width to suit different fabrics and projects. Use the stitch length dial to increase or decrease the length‚ ensuring proper seam strength and fabric flexibility. Similarly‚ adjust the stitch width to accommodate various materials‚ from delicate fabrics to heavier textiles. Proper adjustment ensures even stitching‚ prevents fabric stretching‚ and enhances the overall quality of your sewing. Refer to the manual for specific guidelines on optimal settings for different fabric types and projects.
Tips for Common Sewing Projects
Use the Singer Simple’s free arm for sewing tubular items like sleeves. Adjust presser feet for zippers or buttons‚ and choose the right stitch for fabric type to ensure professional results.
11.1 Sewing Straight Lines and Curves
For sewing straight lines‚ maintain steady fabric movement and consistent machine speed. Use the edge guide to align fabric edges. When sewing curves‚ gently guide the fabric around the needle‚ keeping it smooth. Pivoting at corners with the needle down ensures sharp turns. Adjust stitch length for tighter curves. Practice on scrap fabric to master control and even stitching. These techniques enhance precision and professionalism in your sewing projects.
11.2 Hemming and Seaming Techniques
For hemming‚ fold fabric edges and press‚ then sew along the fold using a straight stitch. Backstitch at the start and end for durability. For seaming‚ align fabric edges‚ pin‚ and sew with a ¼-inch seam allowance. Press seams flat or open‚ depending on the project. Use a walking foot or Teflon foot for smooth handling of thick fabrics. Reinforce stress points with additional stitches. These techniques ensure professional-looking hems and seams in your sewing projects.
Warranty and Customer Support
The Singer Simple Sewing Machine comes with a warranty covering manufacturing defects. For support‚ visit Singer’s official website or contact their customer service for assistance and inquiries.
12.1 Understanding the Warranty Terms
The Singer Simple Sewing Machine is backed by a warranty that covers manufacturing defects for a specified period. Typically‚ the warranty includes 5 years on the machine head and 1 year on electrical components. It does not cover damage caused by misuse or normal wear and tear. For detailed warranty terms‚ refer to the manual or Singer’s official website. Keep your purchase receipt as proof of ownership‚ as it may be required for warranty claims. Understanding these terms ensures proper coverage and support for your sewing machine.
12.2 Contacting Singer Customer Service
For assistance with your Singer Simple Sewing Machine‚ Singer offers reliable customer support. Visit their official website to access a comprehensive support section‚ including FAQs‚ troubleshooting guides‚ and downloadable manuals. You can also contact Singer’s customer service team via phone or email for personalized help. Additionally‚ Singer provides a warranty service center locator to find authorized repair centers near you. Their dedicated team ensures timely resolution of any queries or issues‚ ensuring a seamless sewing experience with your Singer Simple machine.
The Singer Simple Sewing Machine is a versatile tool for both beginners and experienced sewists. Its ease of use and variety of features make it ideal for countless projects. By following the guidelines in this manual‚ users can unlock their full creative potential and enjoy seamless sewing experiences. Happy sewing!
13.1 Final Tips for Maximizing Your Singer Simple
To maximize your Singer Simple sewing machine‚ always refer to the manual for maintenance tips like oiling and cleaning. Regularly check and replace needles for optimal performance. Experiment with the 32 built-in stitch patterns to enhance your projects. Use the free arm for sewing cuffs and sleeves effortlessly. Keep the machine on a stable surface to ensure smooth operation. Practice on scrap fabric before starting important tasks. Take advantage of the one-step buttonhole feature for quick‚ professional-looking results. Happy sewing!
13.2 Encouragement to Explore Creative Sewing Projects
With the Singer Simple sewing machine‚ the possibilities for creative projects are endless. Start with simple tasks like hemming clothes or crafting home decor‚ then gradually explore more complex designs. The machine’s versatility and user-friendly features make it ideal for experimenting with various fabrics and stitches. Try creating personalized accessories‚ quilts‚ or custom clothing. Remember‚ sewing is a journey of creativity and learning. Don’t hesitate to explore new techniques and ideas—your Singer Simple is the perfect companion for bringing your imagination to life!